
To improve my electronic music mixing skills I learnt a range of production and mixing techniques from various sources which I applied to the Timeline X trailer music.
Before mixing the Timeline X trailer music I researched mixing techniques from Mixing Secrets for the Small Studio by Mike Senior. The book focuses mostly on using these mixing techniques in the context of standalone songs however the mixing techniques still apply to the Timeline X ‘commentary’ trailer music. The 2 techniques which I adopted were level balancing and equalization.
In terms of level balancing Senior writes ‘Try to zero in on what the level of each new instrument means for the mix as a whole, and be aware that a good balance usually involves some kind of tradeoff: on the one hand, you want the track loud enough that you can hear all the things you really love about the individual sound; on the other hand, you need to keep the track low enough in the mix that is doesn’t obscure the merits of more important instruments that are already present.’ (Senior, 2011, 127). In the Timeline X trailer music I made certain tracks louder than others whilst keeping the quieter tracks fairly prominent in the mix.
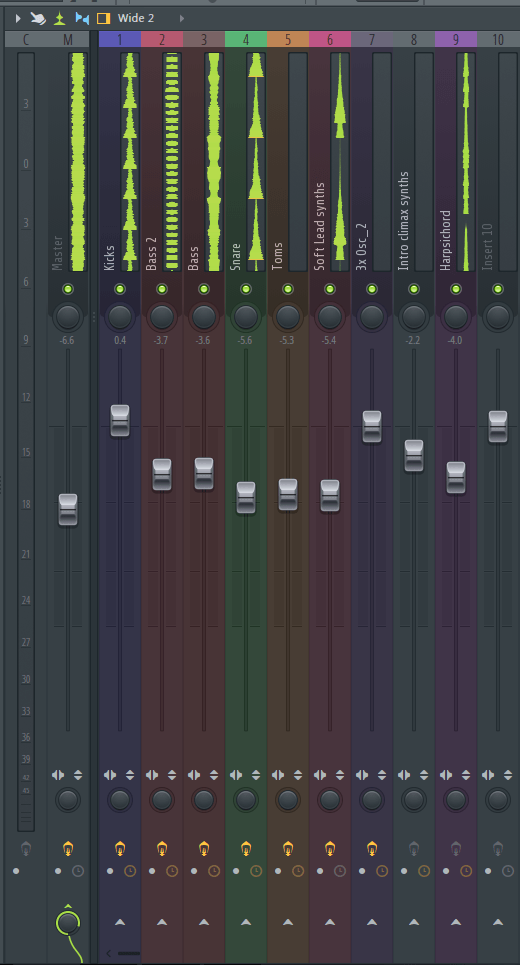
Below is a screenshot of the mixer for an early draft of the Timeline X Trailer music. The separate ‘Toms’ screenshot shows the toms playing at an earlier point in the song. The kicks and bass synths are the most important instruments because they give impact to the 80s vibe and provide a simple rhythm for the melody to sit on top of. The kick fader is higher than the bass fader however I have EQ’d the low end out of the kick drum as explained later in the equalization paragraph. The harpsichord and soft lead synths provide the melodies and are the next most important instruments . The soft lead synths sit slightly below the bass and kicks to give them more space in the mix. The harpsichord is set at the same level as the basses due to the input gain being fairly low which will be raised in the final mix. The least important instruments are the toms and snare which support the kicks and bass synths in the rhythm. The snare has a moderate amount of input gain which will be slightly lowered in the final mix. The toms and snare are set to the lowest level to give space to all of the other more important instruments.
![]()
With regards to equalization Senior writes ‘The main purpose of equalization at mixdown is to address frequency domain problems with the mix balance. Although there’s a place for more subjective tonal EQ’ing at mixdown, this should be a secondary consideration. ‘ (Senior , 2011, 188). Senior continues to explain the psychological phenomenon called ‘frequency masking’ when he writes ‘To put it simply, if one instrument in your mix has lots of energy in a certain frequency region, then your perception will be desensitized to that frequency region of the other instruments. ‘(Senior , 2011, 172). When EQing different instruments in the Timeline X trailer music my aim was to create a stable frequency balance and maintain the timbre of each instrument in the mix whilst avoiding ‘frequency masking’.
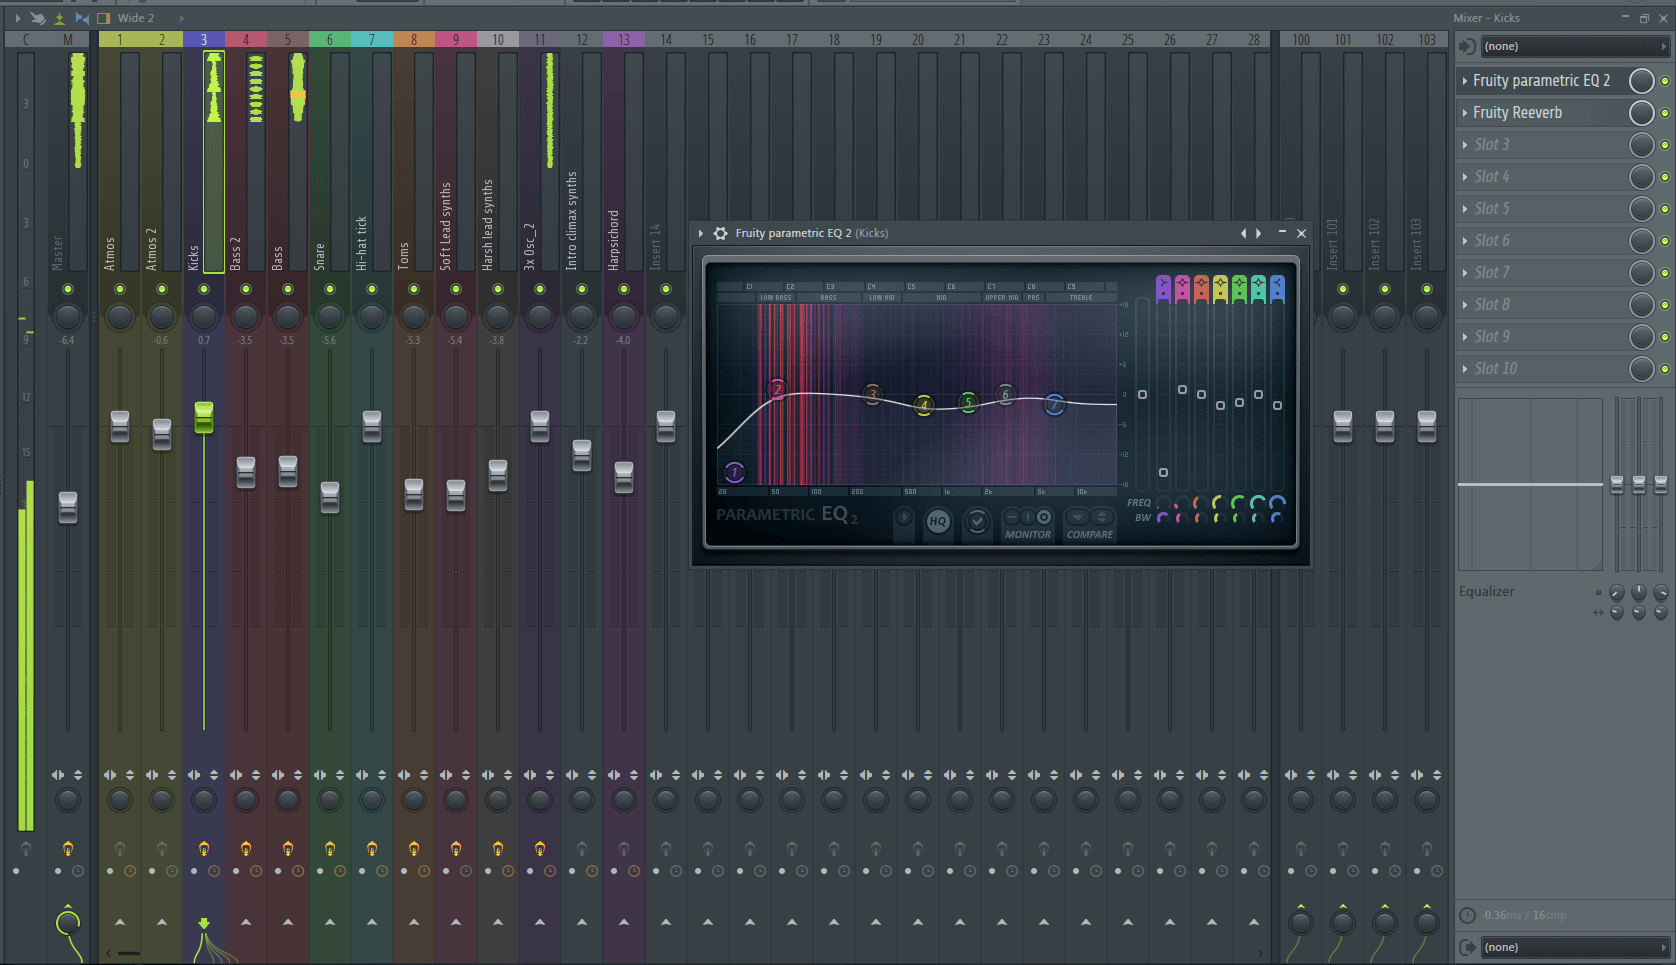
The screenshot below shows my approach to EQing the kicks. I removed a moderate amount of very low end frequencies to make space for the bass synths resulting in a more balanced low end between kicks and bass synths. I slightly raised the low frequencies of the kick to give the kick slightly more impact whilst not making it too overpowering in the mix. I removed a small amount of mid and high end frequencies to make a little more space for the lead synths, harpsichord, snares and toms.
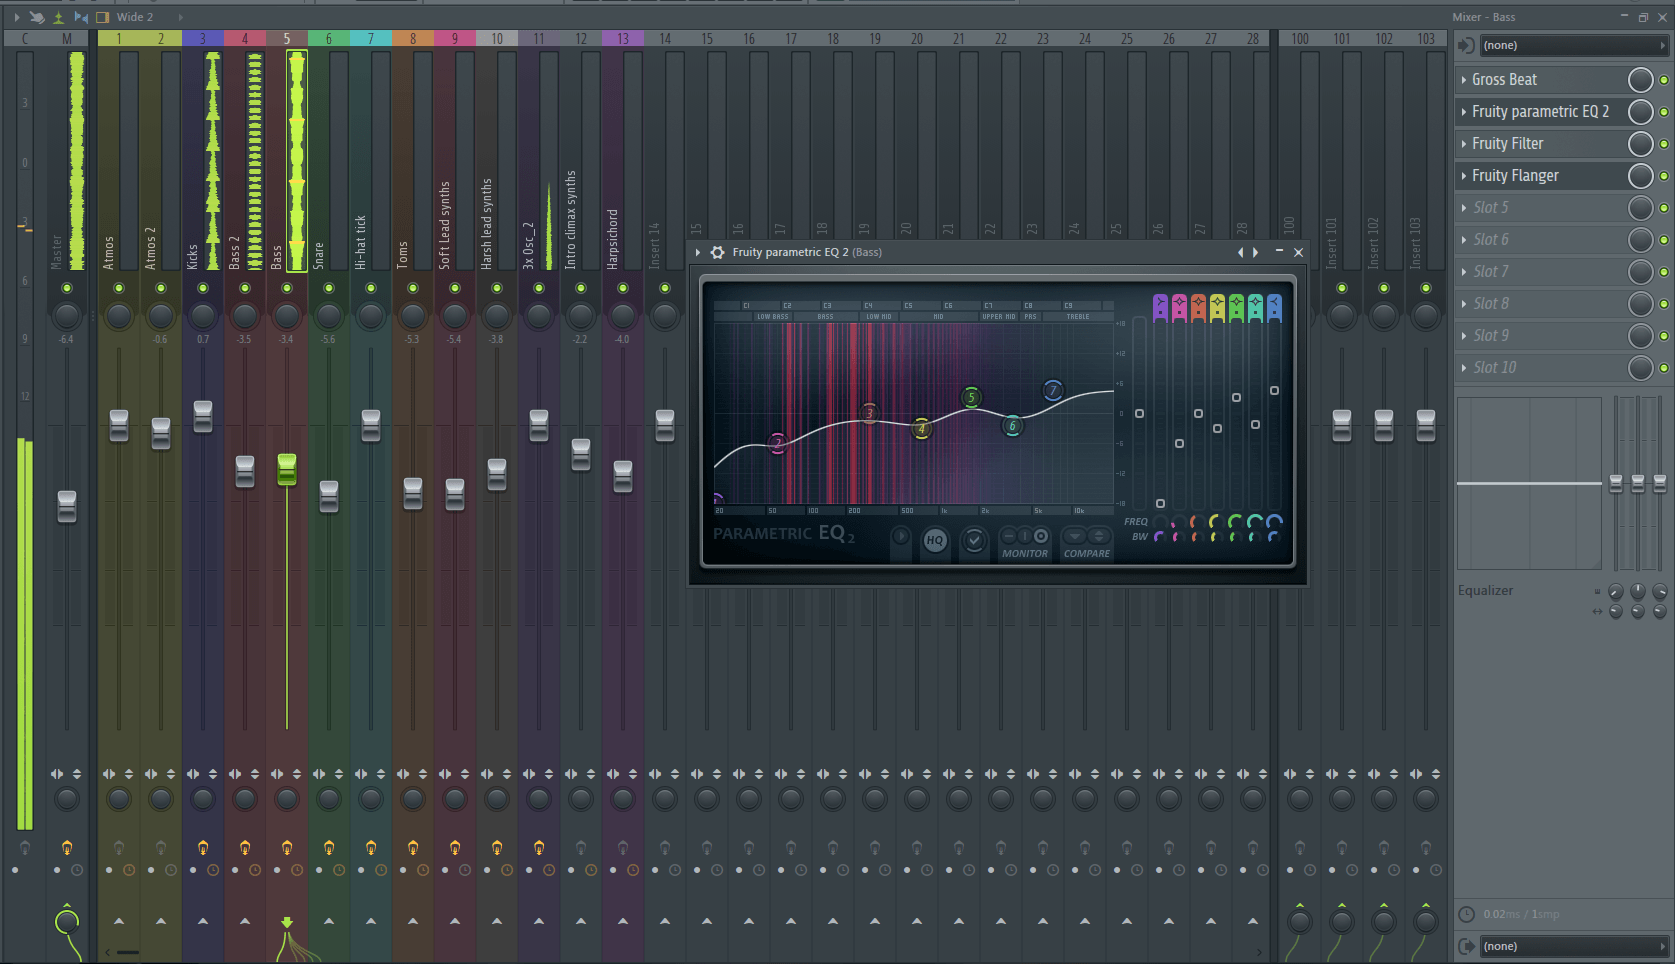
The screenshot below shows my approach to EQing one of the bass tracks. I removed a moderate amount of low end frequencies to make space for the impact of the kicks resulting in a more balanced low end between kicks and bass synths. I removed a small amount of mid and high frequencies to create a little more space for the lead synths, harpsichord, snares and toms. Due to the bass being one of the most important instruments I boosted the upper mid and high end frequencies by a moderate amount to improve the timbre of the sound whilst avoiding ‘frequency masking’ in the harpsichord, snares and toms due to them not taking up much space in the upper mid and high end frequencies.
Before producing the Timeline X trailer music I researched production techniques from a YouTube tutorial called ‘FL Studio Synthwave Tutorials: Make 80s influenced music in FL Studio’ by Nigel Silva. Nigel provides his step by step approach to creating synthwave by showing in the order to work on instruments, 80s composing styles and effects to apply on each instrument.
Nigel begins by pointing out that setting the tempo between 100 and 109 is best suited to 80s music which supported my decision to set the tempo to 108.

Nigel then moves onto working on instruments which he usually starts with the bass synth. Dan uses Nexus and SQ8L for the bass synths. I used SQ8L for my bass and lead synths due to it being free and providing a range of presets to work with. Dan creates a simple fast bassline then decides to layer two different bass synths to create a more full powerful sounding bass. I utilized these technique shown by bass tracks 1 and 2 in the screenshot below.

Nigel continues to EQ the bass at this stage before moving onto the next instrument and does this with every instrument he moves onto however this is a technique I left until after production. I produced the trailer music first, level balanced then EQd as pointed out in ‘Mixing Secrets for the Small Studio’ by Mike Senior.
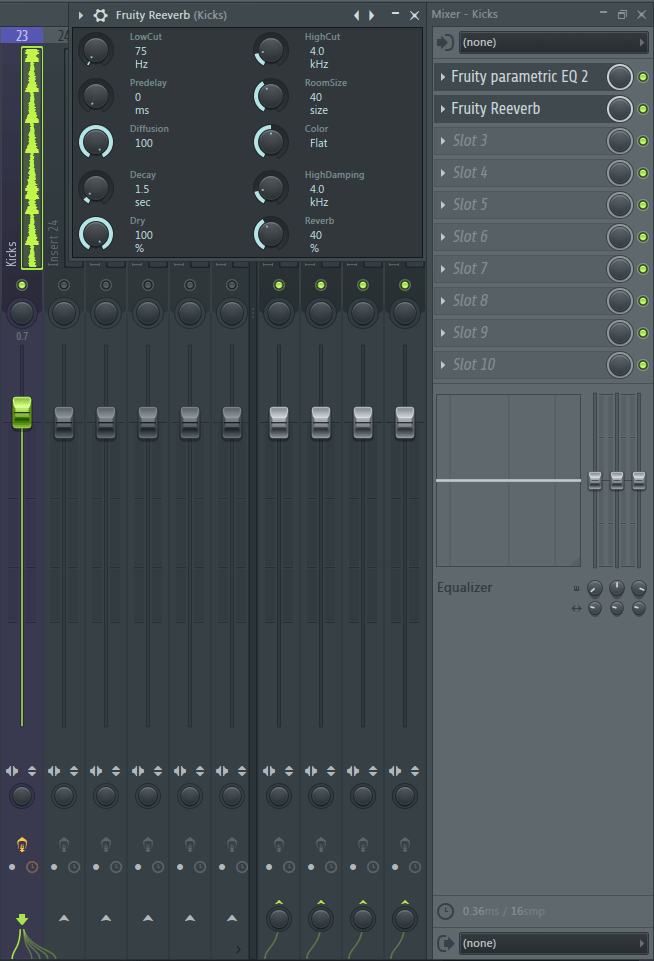
Nigel then focuses on the drums starting with kicks. Nigel produces a simple kick drum pattern which is a composing style I made use of. Nigel layers two different kicks which is a technique I chose not to adopt due to my single kick sound having enough prominence in the mix. To make the kick sound more 80s Nigel adds a fairly strong but subtle reverb to the kicks which is a technique I utilized in the mix stage by setting the reverb to 40% shown in the screenshot below.
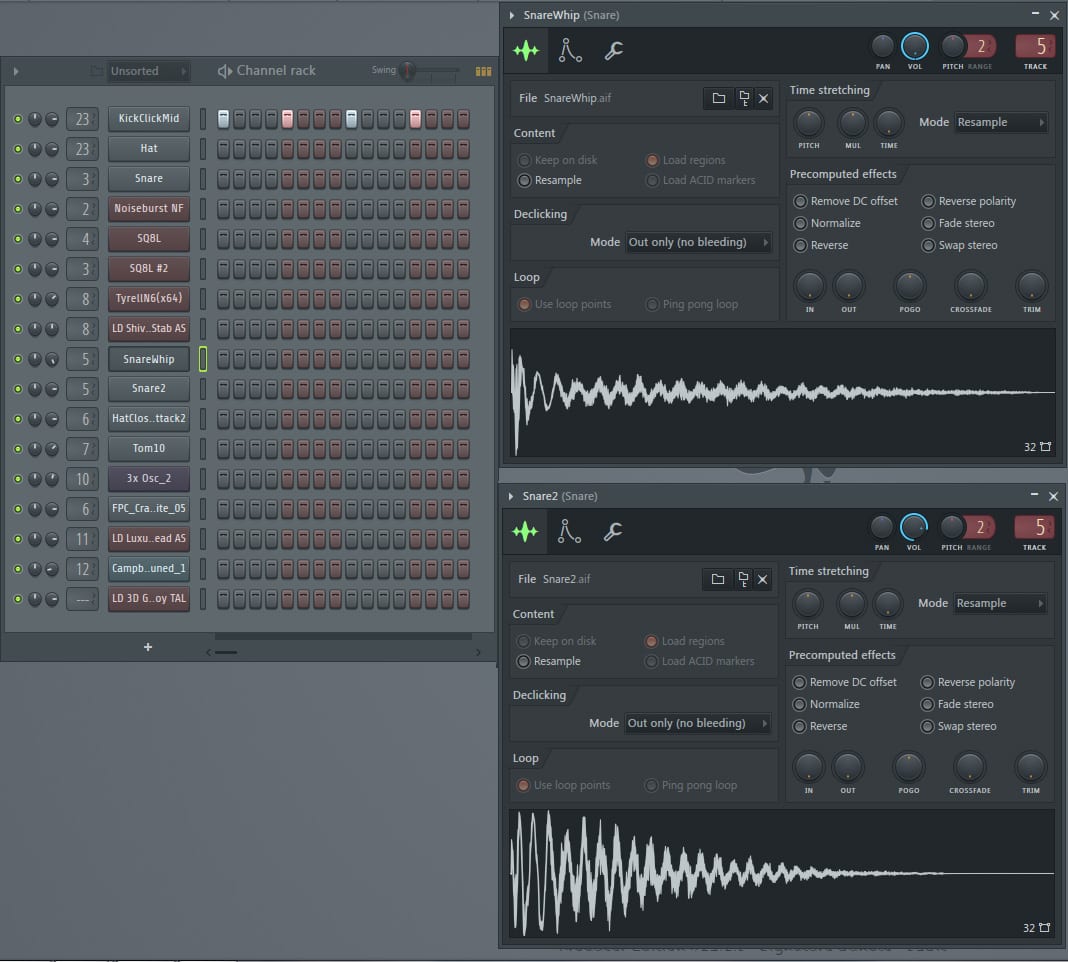
Nigel then works on the snares by producing a simple snare pattern that usually plays at the same time as the kick then layers two different snares to create a more punchy snare sound. I utilized these techniques shown in the screenshot below where I sent ‘SnareWhip’ and ‘Snare2’ from the channel rack into track 5 of the mixer.
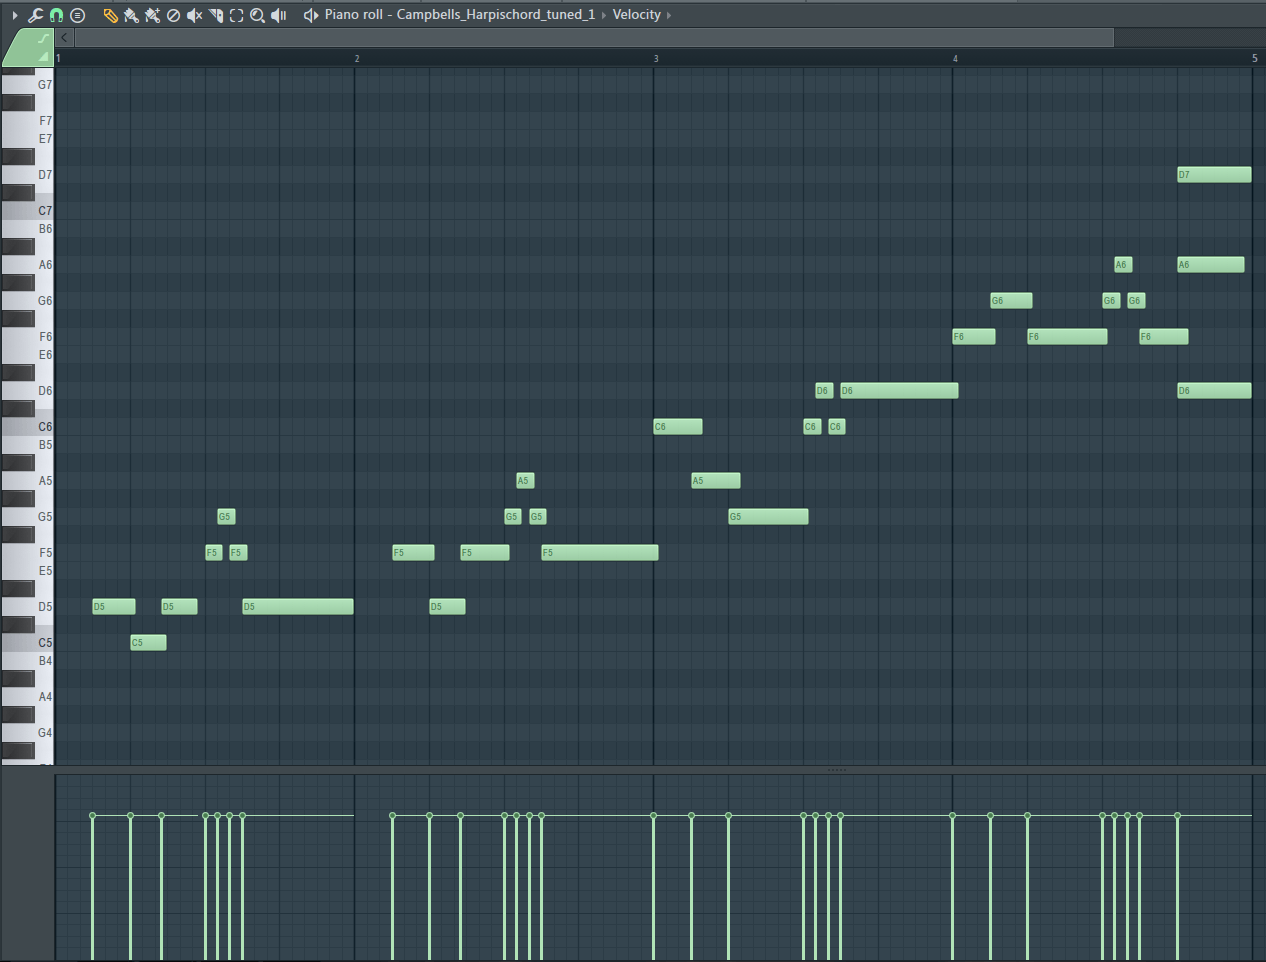
Nigel moves onto lead synths where he produces a straight forward note progression consisting of a few quick notes leading to a long sustain of the 3rd note and repeating. Nigel advises viewers to play around with note progressions in the piano roll and find one that works best for their song. I utilized this technique shown in the screenshots below where I created note progressions as well as chord progressions in the piano roll for the lead synths and harpsichord.
Synth note and chord progression
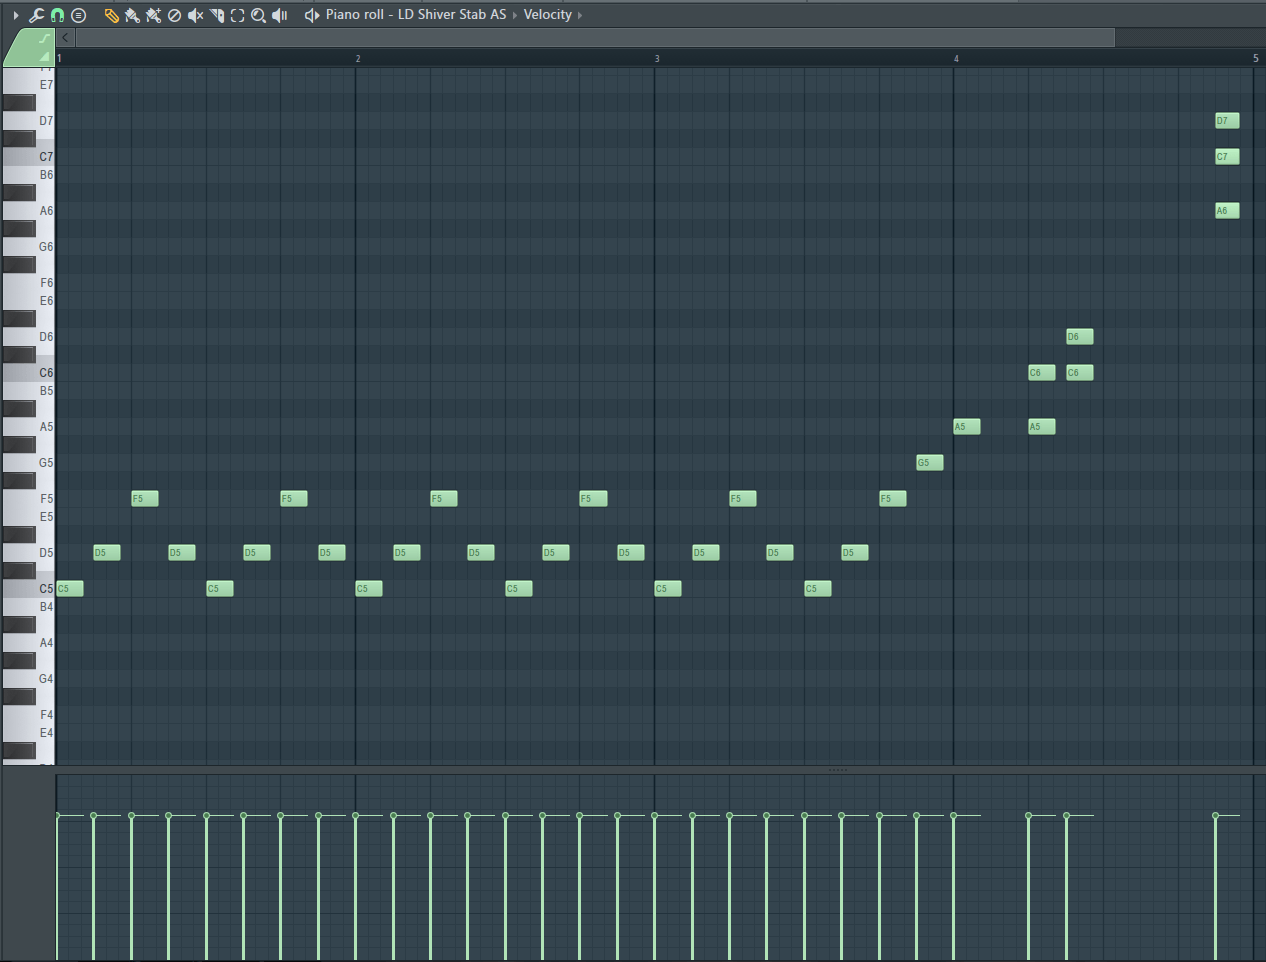
Harpsichord note and chord progression
Nigel concludes his video with some mixing techniques like applying moderate compression via the compressor in the master channel and using ‘bitcrusher’ to add hissing to the mix. Nigel explains how 80s music has hissing to it so to emulate this hissing you can use various plugins like ‘bitcrusher’ to emulate the hiss sound in your mix. I chose not to adopt these mixing techniques and instead applied a very small amount of compression to maintain the moderate dynamic range as well as not using any hissing emulator plugin due to the mix already having enough components that give it an 80s vibe.
As a result of learning a range of production and mixing techniques from Mixing Secrets and the Youtube synthwave tutorial I produced the trailer music below
Sources
Senior, M. (2011) Mixing Secrets for the Small Studio. Burlington: Focal Press.